Showing posts with label Tips and Tricks. Show all posts

Wednesday, 19 June 2013

How to add a floating or fixed header to blogger.

floating-header

Hi! Guys in this post I would like to tell you about ‘How to add a floating or fixed header to blogger.’

The header portion remains fixed while you scroll down the page of your blog. This can be done by making some changes to the style sheet of the template. Don’t worry I am with you throughout this.

But before making any changes to your template please backup it.

Now follow these simple steps:

  1. Log in to blogger.
  2. Go to template and backup it first.
  3. Click on ‘Edit HTML’.
  4. Now search for #header or header#masthead or something like this that defines the header portion of the template. You can do the search by pressing Ctrl+F.
  5. Add position:fixed; z-index:200; background-color: #fff; to the #header portion of style sheet.
  6. This part of the code makes the header portion to stick at the top of the blog and any other content.
  7. Now we have to make some changes in the #main portion to prevent the posts from being positioned underneath the header.
  8. Search for #main or the portion that defines the main portion of the blog.
  9. Add margin-top:200px; to the #main portion of the style sheet.
  10. Sometimes you have to make some modifications in the style sheet according to your needs.


If you have any genuine problems regarding this post please feel free to contact.

Print Page

How to add arrow keys to navigate in blogger


Hi! Guys in this post I would like to tell you ‘How to add arrow keys to navigate in blogger’.

This widget helps you to navigate from one page to next page and also one post to the next. Navigating through this widget is so helpful because otherwise we have to search for the next post link on the blog, with this that problem can be avoided.


Adding and removing this widget from your blog is so simple. You can add it by clicking on the ‘Add to Blogger’ button.


How to let others know of this?

You can do it by adding some floating images like I done it on this blog. You can let them know by showing some text on your blog.

If you want to show some floating images follow these simple steps.

Log in to blogger.

Go to template. At first backup your template and click on edit HTML.

Search for ]]></b:skin> . You can do this by pressing Ctrl+F.


Add this below code just before ]]></b:skin>.


Now search for </body> and add the below code just before </body>.


Now click on ‘save’ button and you can see the changes on your blog.

You can edit the image links of the navigation keys in the above code.

If you have any genuine problem regarding this post please feel free to contact.

Print Page

Tuesday, 21 May 2013

How to add Floating Social Share bar


Hi guys! In this post I would like to tell you ‘How to add Floating Social Share bar’.

Generally bloggers use social networking sites to promote their content and get visibility. With this widget we can easily access different kind of social networking platforms at one place.

Adding this to your blog is so simple that it takes barely two minutes to do so.

Follow these simple steps:

  1. Log in to blogger and go to Layout.
  2. Click on Add a Gadget and select HTML/JavaScript and paste the following code and save it.
  3. Before saving it change the techpro4u with your twitter account name.
  4. You can customize this widget according to your convenience.
  5. By default the position of the widget is left if you want to change it to right change left to right.
  6. Check out your blog for the changes.

CODE:

<!-- Sidebar share buttons techpro365.blogspot.in--><style type="text/css"> #pageshare {position:fixed; bottom:5%; margin-left:-780px; float:left; border-radius:5px;-moz-border-radius:5px;-webkit-border-radius:5px;background-color: #b2e0ff;padding:0 0 2px 0;z-index:10;} #pageshare .sbutton {float:left;clear:both;margin:5px 5px 0 5px;} .fb_share_count_top {width:48px !important;} .fb_share_count_top, .fb_share_count_inner {-moz-border-radius:3px;-webkit-border-radius:3px;} .FBConnectButton_Small, .FBConnectButton_RTL_Small {width:49px !important; -moz-border-radius:3px;/*bs-fsmsb*/-webkit-border-radius:3px;} .FBConnectButton_Small .FBConnectButton_Text {padding:2px 2px 3px !important;-moz-border-radius:3px;-webkit-border-radius:3px;font-size:8px;} </style> <div id='pageshare' title="Get this from techpro365.blogspot.in">
<div style="margin-left:8px;"><div class='sbutton' id='like' style='margin: 5px 0 0 5px;'><script src='http://connect.facebook.net/en_US/all.js#xfbml=1'></script><fb:like layout='box_count' show_faces='false'></fb:like> </div></div>
<br /><div class='sbutton'><a class='twitter-share-button' data-count='vertical' data-via='techpro4u' expr:data-counturl='data:blog.url' href='http://twitter.com/share' rel='nofollow'>Tweet</a><script src='http://platform.twitter.com/widgets.js'; type='text/javascript'></script>
<br /><div class='sbutton' id='gplusone'> <script type="text/javascript" src="https://apis.google.com/js/plusone.js"></script> <g:plusone size="tall"></g:plusone></div><br/><div class='sbutton' id='su'> <script src="http://www.stumbleupon.com/hostedbadge.php?s=5"></script> </div> <div class='sbutton' id='digg' style='margin-left:3px;width:48px'> <script src='http://widgets.digg.com/buttons.js' type='text/javascript'></script> <a class="DiggThisButton DiggMedium"></a> </div> <div style="clear: both;font-size: 9px;text-align:center;">
<a href="http://techpro365.blogspot.in/" target="blank"><font color="red">Get This<font></font></font></a></div><!-- Sidebar share buttons End --></div></div>


 If you have any genuine queries or facing any difficulties in following the post feel free to ask through the forum or the contact page.


Print Page

Monday, 20 May 2013

How to add 'Wibiya toolbar' to blogger.


HI guys! Today in this post I am going to tell you ‘How to add Wibiya toolbar to blogger’.

What is Wibiya toolbar ?

Wibiya toolbar is a customizable, free and attractive toolbar which allow users to share or promote your content mainly through the social networking sites. The main feature of this toolbar is that the user has no need to navigate away from the site.

Adding this toolbar to your blog or website is very easy. Just follow these simple steps.

  1. Go to Wibiya click on get it now.
  2. Fill in the form details.
  3. Now you will see a screen that looks like this.


  4. Log in to your blogger account.
  5. Follow the instructions on wibiya website.
  6. Click on “Add Widget” at the bottom of the directed page.


  7. Now check your blog for the attractive wibiya toolbar at the bottom of the page.

Print Page

Friday, 17 May 2013

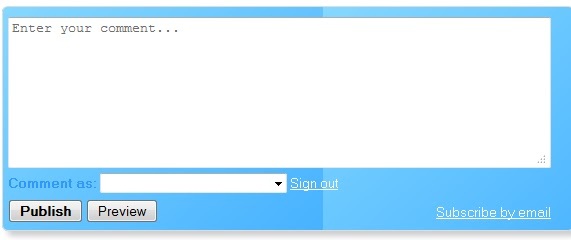
How to customize themes of comment box in blogger


Hi! Guys many of us got bored using the simple theme in the comment-box in blogger. Can we change the theme? Of course yes!

In this post I will tell you how to change the comment box theme.

Follow these simple steps:

  1. Log in to blogger.
  2. Go to template, click on Edit Html.
  3. Now find this code]]></b:skin> and paste the below given code before it. You can do it by using Ctrl+F. Also find <div class='comment-form'> and replace class with id.
CODE:


You can change the background URL with the image URL you like from the images given below. You can also change the color:#0ab00a, Arial and other attributes of your choice.


If you have any genuine doubts about changing the comment-box template, please feel free to contact.

Print Page

Monday, 6 May 2013

How to add 'Facebook-Twitter-Google+' follower box


Today in this post I would like to take you through the process of “Adding a useful followers widget”. As you guys already know about a ‘follow box’. In this widget we have three in one follow box facility for Facebook , Twitter and Google+. This is a cool widget which shows all your followers at one place. Adding this widget to your blog is very easy.

Follow these steps to add this widget to your blog:

1. Login into your blog and go to Layout.
2. Click on ‘Add a Gadget’.
3. Copy and paste the below given code and click on ‘save’.
4.  Now open your blog and you can view the widget working.


Before adding the code to your blog, please paste it in notepad and make these changes:

1. Change ‘Techpro365’ to your blog’s fan page.
2. Change ‘techpro4u’ to your twitter.
3. Change the google+ id ‘106197391344352891445’ with yours.

CODE:


If you have any genuine queries about this post or facing any problem feel free to ask by posting in the comment box.


Print Page

Saturday, 16 March 2013

How to remove 'comments box' from static page on blogger

Many bloggers face the problem of removing the ‘comments box’ from static pages on blogger. This can be done by using the page settings at the right side of the editor.
Click on ‘page settings’--> ‘options’ and select the ‘Don’t allow,hide existing’ radio button and click on ‘Done’ and update it and you are done.

page settings for static pages in blogger


Print Page

Thursday, 28 February 2013

5 Mistakes to avoid while using and starting a blog


A good number of people are interested in starting a new blog in this highly developing internet era. Some of them had taken it as a hobby while some as a daily profession. However as we know that nothing is easy, it also is applicable for blogging. Plan before you act as there are many things that you cannot modify or change when once done. A number of essential parameters are there that are to be considered before starting a new blog while some of them are discussed here in this post. Many new bloggers end up in taking those steps that are to be avoided while blogging. So, here in this post I would like to point out those aspects which are to be avoided preferably.

Let’s have a look at some of the commonly committed mistakes while starting a new blog:

Settle Down for the Best Niche and Stick to it!

The first thing you need to keep in mind in order to become a successful blogger is to settle down for the best niche. Most of the time new bloggers take up random topics and start to blog on those random topics. This approach usually fails to create an impact in the blogging field and make them to quit blogging. Do some research on the niche before taking up the task of blogging as it is one of the major aspects in the process of blogging. So, make sure that you settle down for the right and best niche.

Don’t Start a Blog Merely for Money

There are a number of new bloggers who start a blog for earning some quick money. However they are not successful in either getting money or getting the considerable amount of traffic. Stick to the topic and provide a good, useful and interesting content to attract more number of visitors and thereby earning money through monetising your blog. It is always advisable to concentrate more on the content and other aspects related to it rather than thinking in earning point of view. Your earnings start easily if you have considerable amount of daily traffic.

Say ‘No’ to Plagiarism

Plagiarism means copying the content from other blogs and websites and posting it on your blog. In simple words the using of Ctrl+C and Ctrl+V combinations. Some of the new bloggers who usually don’t want to put in some hard work in research about a particular problem or topic follow these shortcut ways. During the starting days it will be easy but as the time goes on they face the difficulties in that shortcut path. The quality of the content is the main root of the blog. So, don’t opt for any shortcut ways for the blog content. Do some research before posting something on your blog and your aim should be is to generate good quality original content.

Don’t fall for Showy or Garish Blog Designs

One of the major mistakes bloggers generally commit is to fall for showy template designs. Most of the times they tend to use fancy and colourful templates. However these templates lack the official look. Many readers may find it difficult to read your posts and may also miss the important content and complain about the appearance of your blog. So it is always advisable to stick with a highly professional and simple light kind of template. It may increase the chance of getting more number of return visitors.

Avoid Complex Categorizing and Tagging

Categories and tags usually refer to the table of contents of your blog. They help the visitors or readers to find the content needed to them with ease. This is another aspect in which most of the new bloggers tend to make mistakes in.

The problem with them is that they fail to understand the mere purpose of categories and tags is to simplify your blog visitor’s visit to your blog. They try to use the maximum number of keywords related to the post that may result in a huge number of tags which is so confusing. 

Many a time in the process of keeping things organized, new bloggers forget to take into consideration this parameter, which is exactly why categories and tags come out to be of no use to them. This is why you need to be very careful while choosing categories and tags. Maintain balance while using these parameters. You must plan categories well in advance as they need to possess a meaning. On the other hand the tags that you need must be based on the keywords that are likely to be searched by the visitors.

So, if you are starting a new blog try to avoid these aspects. If you already started blogging stick with your niche and avoid making mistakes like changing the theme or posting something that is not related to your niche or the theme.

If you think there are also other aspects that are need to be discussed but are left, please feel free to let me know by posting in the comment section below. I wish you all the best and for a grand success in the field of blogging.


Print Page

Tuesday, 26 February 2013

Submit your site to Search engines like Google and Bing.


The first step to getting your site online and to get better rankings in Google is to submit your URL to search engines. An example of an URL is www.blogger.com. Eventually the search engines will find your site but this will help expedite the process.
Once you submit your URL, it could take several days, weeks, or months for the search engines to index your page(s). Results may vary so don’t write this in stone. Factors such as other websites pointing to your site can affect this time as well.
Submitting to Google:
 1. Go to the following link: http://www.google.com/addurl/?continue=/addurl
2. Type in your URL, example: http://www.yoursite.com
3. Enter comments about your site. This is optional. Usually I enter the genre of the site and a few keywords. Example: Blogger tips and tricks.
4. Enter the captcha text shown in the box
5. Select “Add URL”
 Submitting to Bing:
 1. Go to the following link: http://www.bing.com/docs/submit.aspx
2. Enter the captcha text shown in the box
3. Type in your URL, example: http://www.yoursite.com
4. Select “Submit URL”
 Ask does not have an URL submit feature. Until recently, you could submit your sitemap to them. But Ask.com has now retired this feature and says they will be crawling sites instead. So, the next best thing is to add a directive in your robots.txt file that specifies auto-discovery of the XML sitemap.Like this:SITEMAP: http://www.the URL of your sitemap here.xml. The sitemap location should be the full sitemap URL.
That’s it! Once you complete the above steps, just sit back and be patient. It takes time for the search engines to index your pages. If you submit more than once, some search engines may consider this spamming which could result in not indexing your site at all.


Wednesday, 20 February 2013

How to out stand your blogging competition


Have you ever thought of standing first out of the competition among all the blogs? Did you know there are a number of essential ways to beat the other bloggers by becoming a better blogger?

The most critical ways to out-blog other blogs are described below. The best part is that they are all free and you can begin implementing them as part of your blogging journey immediately.

1. Be More Useful
Make your blog so useful to visitors that they can’t resist themselves from visiting it. And also make them feel that not visiting would mean they could miss something very important or big. Always keep in mind, usefulness comes first and is available in a lot of different forms, shapes, and sizes. Your blog could be useful because it delivers breaking news, health-tips, blogging-tips, in-depth tutorials, expert advice, and more. Even entertainment can be useful for people who want and need it. Check out other blogs and figure out how you can be more useful, and then deliver that added value of usefulness on an ongoing basis.

2. Be More Trustworthy and Reliable
If people can trust that your blog will deliver that useful information they need, and they can rely on you, they'll come back again and again. If you can be more trustworthy and reliable than other blogs, then you'll be able to beat them by attracting and retaining more visitors.

3. Look Better
Your blog design should match your theme and also the promise to visitors. Make sure you live up to it by playing and looking the part in every interaction and experience that people have with your blog through comments or any other means. Confusion is a big enemy to bloggers, so make sure your blog is consistent in every way. Select a good blog design that sets expectations immediately when people visit.

4. Get Better Connections and More of Them
You should always build good relationships with your blog visitors and with people across the social web. Also, connect with other bloggers who can help to boost your online content by sharing them either directly or indirectly. These relationships help to increase sharing of your blog content, boost conversations about your blog, jump start comments for each of your blog posts, and there-by increasing traffic to your blog.

5. Care More
You should care more about your blog. That means you should take care about:
Ø  Your visitors by acknowledging them when they publish comments on your blog posts, thanking them for sharing your content with their own audiences, responding to their email messages, and so on.

Ø  Your content by publishing consistently with useful and trustworthy information on a reliable basis that meets your audience's expectations.

Ø  Your blog's performance by monitoring your traffic and publishing more of the type of content your audiences wants.


Print Page

Monday, 18 February 2013

Best blogging tips

best blogging tips


When starting a successful blog, you must learn to be consistent and patient. Consistency is a major factor because you must provide fresh information that will engage readers on a regular basis. In order to gain readers and create a successful blog, you must also be patient. It can take time for your blog to catch on.


Title of the post

Ensure that the titles of your blog posts are very catchy. Imagine that you are someone who is just browsing the internet and you see your blog post among thousands of others. You should ensure that your blog headline sticks out from the rest of the blog posts.


Length of the post

If you have a very long post, divide it into smaller parts, posted with the title and part number. If a reader finds the first part engaging, they will be enticed to return for further parts. Doing so also ensures that your readers do not become overwhelmed by an especially lengthy post.


Stick with the content

Try to make sure that you are always writing with your readers in mind. Do not partake in keyword stuffing where you throw a ton of keywords into your blogs to get the search engines attention. Ultimately, your content and writing style will have the final say in whether your blog succeeds or not.


Maintain consistency

Make sure that you consistently post when running a blog. If you don't post content regularly, then your site traffic will diminish fairly quickly. Have a guestbook or contact information posted as well, so your audience can interact and provide feedback. If your readers are happy with your response, they are more likely to come back.


Don’t get too involved in formatting

Don't go crazy with font styles, capitalizing, underlining, bolding and the like. While it is important to use formatting appropriately, too much formatting makes everything merge together on the page. Only use special font styles when you really need to draw the reader's attention to a particular word or thought.


Take a note

Everything you do can end up being the subject of a blog. Take notes when you are away from the computer, if you stumble across an idea that may translate into a post. You should always keep your eyes open for subject ideas. Writing is the easy part, it's coming up with the initial concept that usually leads to writer's block.


Comments

You'll need to decide if you want to publish all comments as they come in, or whether to hold them for approval before they appear on your site.

Now that you are more aware, do not hesitate to put these insights to work for you immediately. Successful Blogging can be enjoyable, if you take the time to do it with sincerity and knowledge. Start today and reap the benefits that are possible with the insights provided.


Print Page

Thursday, 7 February 2013

How to add 'You might also like' widget for blogger

EDITED!!!
After a series of problems faced by the users we finally found a way to make this widget work properly. Please leave a comment below in case of any problems.


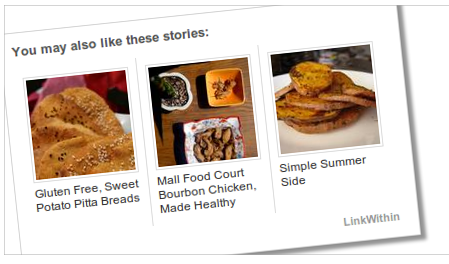
In some blogs and websites you may have seen this ‘You might also like’ widget somewhere below the posts in the footer part. It will help you to keep your readers for some more time on your blog. Here in this tutorial I will take you through a set of instructions on how to add ‘You might also like’ widget for blogger.

i. First of all go to linkwithin. website.


ii. Fill the form with,
Your email
Your Bloglink
1.                 Your blog url (with http://)
2.                 You can decide how many stories you want to show below posts, May be set to 3,4 or 5.
3.                 Now choose Light Dark Combination if your blog has light background then leave it blank otherwise check that Box
4.                 Choose the platform as 'Other'. Click on 'Get Widget!'.
5.       Choose one option and click on continue.( I opted the second).
6.       You will get a HTML code.

LinkWithin - techpro365.blogspot.in


Go to layout of your blog and click on 'Add a Gadget'. Copy and paste the code (that you will get after clicking "Get Widget!" of the LinkWithin page) in the content of 'HTML/JavaScript' type and save it. Drag and Drop the LinkWithin box under the "Blog Posts" box for better performance.

If you have any genuine problems regarding this post feel free to contact me.


Print Page