Friday 9 November 2012

How to add or remove Registry editor to control panel

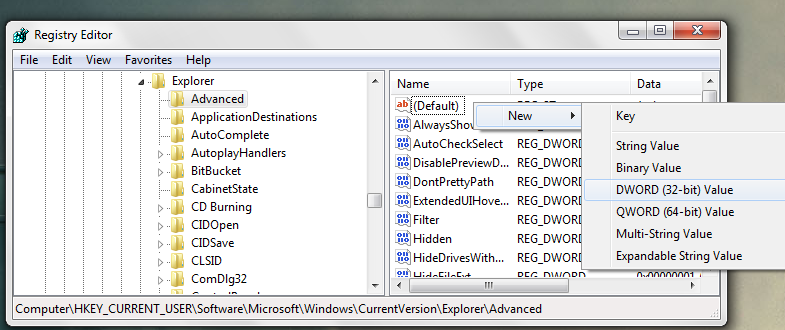
                                                                        Here in this tutorial i like to discuss How to add or remove registry editor to control panel.Generally in the windows provided control panel we don't find any Registry editor contained in it.Now i created a .reg file by running it we can add or remove registry editor to control panel.

To add Registry editor to the control panel:
1.Open notepad and copy the content below CODE.
2.Save it as ".reg" type and name it as anything you want preferably "AddRegeditToControlPanel".

CODE :


Windows Registry Editor Version 5.00

[HKEY_CLASSES_ROOT\CLSID\{77708248-f839-436b-8919-527c410f48b9}]
@="Registry Editor"
"InfoTip"="Starts the Registry Editor"
"System.ControlPanel.Category"="5"

[HKEY_CLASSES_ROOT\CLSID\{77708248-f839-436b-8919-527c410f48b9}\DefaultIcon]
@="%SYSTEMROOT%\\regedit.exe"

[HKEY_CLASSES_ROOT\CLSID\{77708248-f839-436b-8919-527c410f48b9}\Shell]

[HKEY_CLASSES_ROOT\CLSID\{77708248-f839-436b-8919-527c410f48b9}\Shell\Open]

[HKEY_CLASSES_ROOT\CLSID\{77708248-f839-436b-8919-527c410f48b9}\Shell\Open\Command]
@=hex(2):25,00,53,00,79,00,73,00,74,00,65,00,6d,00,52,00,6f,00,6f,00,74,00,25,\
  00,5c,00,72,00,65,00,67,00,65,00,64,00,69,00,74,00,2e,00,65,00,78,00,65,00,\
  00,00

[HKEY_LOCAL_MACHINE\SOFTWARE\Microsoft\Windows\CurrentVersion\Explorer\ControlPanel\NameSpace\{77708248-f839-436b-8919-527c410f48b9}]
@="Add Registry Editor to Control Panel"

Code for How to remove Registry editor from control panel.

CODE:


Windows Registry Editor Version 5.00

[-HKEY_CLASSES_ROOT\CLSID\{77708248-f839-436b-8919-527c410f48b9}]

[-HKEY_LOCAL_MACHINE\SOFTWARE\Microsoft\Windows\CurrentVersion\Explorer\ControlPanel\NameSpace\{77708248-f839-436b-8919-527c410f48b9}]

That's all for today folks if you have any issues please contact through comment.If you like the post spare a minute to share it.


Print Page

Wednesday 7 November 2012

How to backup Windows registry


Registry editor is a very important tool to make some registry operations and hacks.It is very important to backup the registry as it may effect the normal functioning of the computer.Follow these simple steps to backup the registry:
1. Open the registry editor.

A.Click on windows start and type "run" and press enter.


B.Type "regedit" and click ok.


C.A dialogue box appears asking "Do you want to allow the following program to make any changes to this computer?" .press "yes".


D.It will open Registry Editor.

Open Windows 8 Registry Editor
2. Confirm the UAC prompt:
Confirm Registry UAC prompt
3. Click on File and then on Export to start the backup process
Backup Windows 8 Registry
4. Select the checkbox All and enter a name for the registry backup and add the date to the filename:
Create Backup Windows 8 Registry
5. Finally, click on Save and wait – have patience the backup might take a while. You have now successfully created a backup of the registry.
You can restore the backup by using the Import feature of the registry editor, which is also on the File menu.
If you’re running into any problems during the backup let us know

Print Page

Friday 2 November 2012

How to change number of row tiles in windows 8


By default, Windows 8 will try to figure out the number of rows it should show on your Start Screen based on the resolution of your monitor. 

What if you don’t want the number of rows it determines?

 Well, you can change it to a different value if you like. As you can see, I decided to show you 1,2 and 3 rows. You can choose a value from 1 to 5.

Go to Regedit or the registry editor.

 Navigate to the following key:

HKEY_CURRENT_USER\Software\Microsoft\Windows\CurrentVersion\ImmersiveShell\Grid


Create a new DWORD value here and name it Layout_MaximumRowCount. Give it a value between 1 and 5. Enjoy!


Thursday 1 November 2012

Delete Files From The Recent File List In Windows Media Player

Windows Media Player (WMP) is a built-in application that allows you to play multimedia files. Like many other applications, WMP remembers the most recently played files and displays them in the Recent File List under the File menu. This feature is useful if you regularly play certain files, but you may want to clear the list if you share the computer and a user account or create archives and CDs.


You can manually delete the list through the Windows Registry:
1. Start the Windows Registry Editor, regedit.exe, by typing regedit in the Windows Run Command Line.
2. Go to HKEY_CURRENT_USER\Software\Microsoft\MediaPlayer\Player\RecentFileList.
3. Delete the RecentFileList subkey.
4. If you've also streamed content from the Internet, you can delete the RecentURLList subkey.
5. Exit the Registry Editor.
6. Restart the computer.
To keep certain files in the list, don't delete the entire key. Deleting individual entries within the key will get rid of the files that you no longer want in the Recent File List.
That's all for today folks.Thanks for reading and if you like the post feel free to comment and share..........
Print Page

Saturday 27 October 2012

How to create a shortcut for Shutdown and Restart

Have you ever thought of creating a shortcut for shutdown ?
yes,we can create a shortcut for shutdown and restart.

To make a new shortcut, right-click on an empty part of the desktop (or inside a folder). Select New, then Shortcut. A “wizard” will pop up to guide you through the rest of the process. You will have to provide a command line, and then a name. The name can be anything you want.

In the 'Type the location of the item' please type the following:

Shutdown -s -t 00   for shutdown and shutdown -r -t 00 for restart .The time can be any value preferably up to 30.You can also assign an icon to this shortcut.This shortcut can be pinned to your taskbar.


That's all for today folks.If you find the post interesting feel free to share it........


Print Page

Tuesday 16 October 2012

How to disable all notification balloons in Windows


It is too annoying sometimes to see the pop-up notification balloons in the system tray.Have you ever thought of disabling them.This might be an extreme step.You may turn off this notifications in each specific offending application.If you want to disable them then go on....

1.Click on windows start and type "run" and press enter.

2.Type "regedit" and click ok.

3.A dialogue box appears asking "Do you want to allow the following program to make any changes to this computer?" .press "yes".

4.It will open Registry Editor.

5.Go to "HKEY_CURRENT_USER\Software\Microsoft\Windows\CurrentVersion\Explorer\Advanced"

6.Create a new 32-bit DWORD and name it as "EnableBalloonTips" and give it value 0.Now logoff and you will see the changes that are made(No more notification Balloons).


That's all for today folks.If you like the post please feel free to comment and share it...........;-)

Print Page

Wednesday 10 October 2012

How to skip the annoying "use the web service to find the correct program" dialog in windows 7


If we use windows many of us generally find this annoying dialog box.In this tutorial i will tell you how to temporarily disable this dialog box.Follow these simple steps to do so:


1.Click on windows start and type "run" and press enter.


2.Type "regedit" and click ok.


3.A dialogue box appears asking "Do you want to allow the following program to make any changes to this computer?" .press "yes".


4.It will open Registry Editor.

5.Go to "HKEY_LOCAL_MACHINE\SOFTWARE\Microsoft\Windows\CurrentVersion\Policies\Explorer"


6.Create a DWORD named NoInternetOpenWith and give it a value 1.You are done with it.


7.If you want to reset back to default simply change the value to 0 or delete the DWORD.

That's it for today folks.If you find the post interesting please share it.Please feel free to comment.


Print Page

Tuesday 9 October 2012

How to increase the speed of Aero Taskbar Thumbnails in windows 7

When we hover the mouse over a taskbar thumbnail it willshow the specific window.By default there is a specific delay in this process.In this tutorial i will tell you how to increase or decrease the speed of the Aero Taskbar Thumbnails.


1.Click on windows start and type "run" and press enter.
2.Type "regedit" and click ok.

3.A dialogue box appears asking "Do you want to allow the following program to make any changes to this computer?" .press "yes".

4.It will open Registry Editor.

5.Go to "HKEY_CURRENT_USER\Software\Microsoft\Windows\CurrentVersion\Explorer\Advanced"


6.Create a new DWORD by right clicking and name it as "ExtendedUIHoverTime".


7.Give it a decimal value of 0 or 1 which is in milliseconds.To slow it down you can give any value from 400 to 1000 or any.generally nobody wants to slowdown it.
Now logoff and logon and see the change.
So that's all for today folks.If you find the post interesting please spare a minute to share it as "sharing is caring".Please feel free to comment.

Print Page

Monday 8 October 2012

How to prevent windows update from forcibly rebooting your pc

Most of us face this problem and it is really annoying to see the Windows update restart dialogue box sometimes.In this tutorial i will tell you how to temporarily disable this.Follow these steps:


1.Click on windows start and type "run" and press enter.

2.Type "regedit" and click ok.

3.A dialogue box appears asking "Do you want to allow the following program to make any changes to this computer?" .press "yes".

4.It will open Registry Editor.

5.Goto"HKEY_LOCAL_MACHINE\SOFTWARE\Policies\Microsoft\Windows\WindowsUpdate\AU"

6.Create anew 32-bit DWORD value named "NoAutoRebootWithLoggedOnUsers" and give it a value 1.

Now you are done if you want to put things back to the way they were simply delete the 32-bit DWORD.


Print Page

Sunday 7 October 2012

How to cleanup your messy context menu

The most irritating part in windows is the unused set of applications in the context menu.Many don't even use half of them.So,today in this tutorial you will learn how to clean up your messy context menu.If you want to add any application to context menu please read  How to add any application to context menu

1.Click on windows start and type "run" and press enter.

        2.Type "regedit" and click ok.

         3.A dialogue box appears asking "Do you want to allow the following program to make any changes to this computer?" .press "yes".

4.It will open Registry Editor.The context menu items are found at two different locations and are to be handled differently.It is explained further in the post.5.Go to "HKEY_CLASSES_ROOT\Directory\Background\shell"
6.create a new stringvalue and name it as "Extended" and you are done removing it
 7.Go to "HKEY_CLASSES_ROOT\Directory\Background\shellex\ContextMenuHandlers". 8.Click on anything you want to remove click on (Default) and replace its value data with "--" in the front and you are done.
That's all for this post folks.If you like the post feel free to spread this post by sharing it and feel free to comment.If you have any genuine doubts you  can approach me.........

Saturday 6 October 2012

How to create a shortcut for 'Safely Remove Hardware" dialog

We often find it annoying to find the safely remove hardware icon in the system tray.Can't we create a shortcut to do this?yes,of course we can do it.want to create one then go on.....
1. Create a shortcut key by clicking anywhere on the desktop and create a new shortcut.
2. In the Type the location of the item field please paste the following and click on next
    "RunDll32.exe shell32.dll,Control_RunDLL hotplug.dll" 

3. Now name it with any name you like and click Finish.
   4. If you want to assign a shortcut key to it right click on shortcut and click on properties. 
  5. Now in the Shortcut key field type the shortcut key you want to assign Example: CTRL+F12 and click on ok and you are done.

As long as the shortcut is on your desktop you shouldn’t have to restart anything for the hotkey to work. You can also move the shortcut to another folder, for instance your quick launch bar.
Print Page

Monday 1 October 2012

How to access God mode in Windows 7

God mode basically is a windows 7 trick that will help the user to access to all of the operating system's control in one folder.The trick is also said to work in Windows Vista, although some are warning that although it works fine in 32-bit versions of Vista, it can cause 64-bit versions of that operating system to crash.

Create a new folder with the name given below 

GodMode.{ED7BA470-8E54-465E-825C-99712043E01C}


After creating the folder the icon automatically changes to the control panel .

Although its name suggests perhaps even grander capabilities, Windows enthusiasts are excited over the discovery of a hidden "GodMode" feature that lets users access all of the operating system's control panels from within a single folder.

So that's all for today folks.Meet you later in another post.If you like the post feel free to share the link

Print Page

How to add any application to the context menu

So many people want to launch a frequently used application  in the right click menu.In this post i will explain how to add a specific application to the context menu.Follow these simple steps to add a specific spplication to the context menu:


1.Click on windows start and type "run" and press enter.

2.Type "regedit" and click ok.

3.A dialogue box appears asking "Do you want to allow the following program to make any changes to this computer?" .press "yes".

4.It will open Registry Editor.

5.Go to "HKEY_CLASSES_ROOT\Directory\Background\shell"
6.Right click on shell and create key called "Notepad".
7.Right click on notepad and create a new key names command.
8.Right click on (Default) and click on modify and change the value data to "C:\Windows\System32\notepad.exe".(i.e giving the directory of notepad application).

9.You can now see Notepad in the right click of the desktop context menu.

So, that's it folks if you have any queries about this pls feel free to comment below.Thank you for your visit and patience.


Print Page

How to change default template in easy way

How to change default template of the blog to a other template?
             Most of us want to change the template of the blogger as the default template doesn't have some features you may want.So today i will tell you how to change the default template.You should have a "new.xml" file ready with you before doing this.This you can find from some websites which provide free blogger templates.

Follow these simple steps to change the template:


1.Go to blogger dashboard.And click on Template as shown in picture.

2.Click on Backup/restore as in case you find any difficulty with the new template you can change it to old one.
3.Click on Download full template

4.Now save the "old.xml" file of your old template.

5.Now Click on choose file and upload the "new .xml" file of the new downloaded templateand save it.Now you are done with changing your blog template.Open the blog in a new window and you will see the change you made.

SO THAT'S ALL FOLKS.IF YOU HAVE ANY QUERIES ABOUT THIS PLEASE COMMENT BELOW SO THAT I MAY TRY TO HELP.

Sunday 30 September 2012

How To Add Signature In Blogger After Every Post


Many people are so curious to find how to add signature after the end of every blog post. First of all you should have an image url with you of the signature. You can make this by creating a draft post with image in it.(see Html in compose post for URL).
Follow these simple steps to do so:

1. Go to blogger dashboard. And click on Template as shown in picture.


2.Click on edit html.


3. Click on proceed.

4. Click on "Expand Widget Templates".

5. Press ctrl+F and type <data:post.body/> and replace it with <data:post.body/>
<img src='url_of_your_signature_image'/>

6. Now save your template and thats it your blog will be ready with your signature in every post you make.